Tools Of The Landscaping Art

Just another WordPress.com weblog

Battery-Powered Tools March 21, 2010

Filed under: Hand Tools — stevesned @ 5:08 pm

For the ultimate in portability and function, landscapers and – well heck – everyone alive who weilds any tool at all should welcome this stunning pass in electronics. These days, if I have to fix a fence or cut and repair a pipe in some narrow little trench, with a pipe sunk 2 feet below the surface of the ground, there are new, exciting and very easy ways to find a remedy. I can now pack up a battery-powered circular saw or Sawzall or drill or just exactly anything in the power tool realm these days, snap a battery on and be working productively in seconds flat. It used to be, I was  relegated to knuckle-busting hand tools owing to the remoteness from electrical outlets and the need for 300′ of extension cords in inclement weather.

A nice long Sawzall blade can cut through a pipe in a second or two while using only one hand. The tops of fences, the trimming of fence panels, trellises, Gazebo parts and the likes can be done with a lightweight, portable circular saw in those same seconds flat. Indeed, this technological advance achieves better work in less time, saving absolutely everyone – from client to businessman – a lot of time and money.

I must have owned 5-6 of these packages in my time. Naturally, we’re speaking of a guy who operates loud machines with bad visibility, so we’re talking about smashing even the best of tools owing to visibility problems and haste. Other folks value these items with their lives owing to their incredible utility. Just because I am a slob does not mean anyone else is. The value of these machines is absolutely irreplaceable.


Mini Excavators January 23, 2010

Filed under: Machines - Earth and Product Moving/Shaping — stevesned @ 3:26 am

Excavators have become must-haves in landscaping. Especially in climates facing irrigation needs, these powerful and amazingly adaptable little units are pretty impressive by any criterion. Useful for trenching, naturally enough, they also play roles in excavating and even grading with their track-powered movement and their front blades. The amount of torque and general power of these units is off the charts. They can lift thousands of pounds and place them like a jewel in a setting these days. Bear in mind as well, the track system of locomotion means rainy weather is less deterring.

Used in creating a substantial water feature, as in this picture below, we can see the stages and the utility of the “mini-ex”. Posed above with its big brother, we might also notice each has a “thumb” – a hydraulically powered piece of steel which clamps forward, pinching the object between the steel of the bucket  for actually picking up individual items. We will see why this is so handy in just a bit.

The above shows us the initial excavation for the source, then the creek bed which will have water coursing down upon completion. What is not shown is the excavation which has already preceded this where the lines/pipes were laid to conduct the water from the lower levels. Needless to say, the excavator achieved this in its own labors – in fact, it took about a half an hour.

In the picture above, we see the process beginning where the thumb really gets some usage. Like a watchsmith or a jeweler, this guy – me  🙂 – adds a rock canted at just the right angle to lower onto the liner installed below. At this stage, we are setting stones which will receive the initial water, then burst out over some rocks producing a waterfall effect. This kind of work is exacting. Frankly, what the “mini-ex” accomplishes is stunning in terms of time-saving, compared to older methods and it is far less dangerous and less destructive in the right hands.

Placed gently, we construct a fairly enormous edifice, rock by rock, until our 160 foot creek bed is ready to cement at its various falls and then finish. The picture below shows us what the finished, very raw product looks like before planting takes place and obscures much of it.

Voila! You have a creek!

Below is a  shot of yet another water feature where we need to apply cement, a bit at a time, to receive the boulders/rocks and then cement into place. What we see here is a bucket full of prepared, wet cement as the handsome sucker down in the hole spreads it around as judiciously as he can – which is not very, lol.


Here’s a look at this particular finished product:

Some more “Raw” looks at the various functions of the mini excavator – Here carving the earth for a retaining wall system:

Here, utilizing the ‘thumb’ and then packing down a rock in place after a fairly massive excavation, now attempting to somewhat artistically arrange boulders into place.

And the after effects of that effort.

These are just plain gorgeous machines to a landscaper, becoming more utile and widely-used than ever before. Once again, this is a machine whose arrival onto the landscape construction scene has caused far lower prices for harder work, yet which also release the budget for yet more bells and whistles, as it were.


The Grinder January 21, 2010

Filed under: Exotic Tools — stevesned @ 8:17 pm

The Grinder is an awesome tool. It can be used as a saw on metal items – we use it to cut rebar all the time. It can polish, cut, shape and eat into almost any substance known to construction. My most primary uses have been in the realm of cement pavers, personally. With these items, one can literally shape a straight cut into a circular one. This one I am featuring because I have always liked DeWalt tools. It can be found here, at Amazon. If interested. We actually historically have used a heavier duty one, ourselves. I swear, I think it could take down a mountain.

What really makes it dynamic and so utterly utile are the range of blades available. For cutting concrete pavers, for example, we almost always use a diamond-studded, circular blade.

Shaped much like cups, with an indented middle, these blades are able to grind not only on the sides but also by using the larger bottom for larger tasks. What we get as a result is something like this below. There is no other tool which can accomplish this that I am aware of. The grinder, in our work, is an essential part of our tool arsenal for obvious reasons. I honestly believe it separates the pro’s from the amateurs. Attention to details, in the end, are always what that implies.

(These work site pictures expand dramatically for closer viewing…….leftt click to see)

Note the square cuts made by the saw. All bricks are cut in a straight line at the saw itself. However, trimming and some shaping are required in this case in order to achieve the desired results for bricks around round items. Here is a finished look at what we faced above:

In other cases, the grinder actually can be used to “roughen up” or “antique” already tumbled pavers to match the full size brethren. When we scuff up the outer edges, we do so because the brick saw had made its typically “perfect cut”. We need then to ‘re-antique’ the look to conform with the tumbled ones. Here we had cut a circle into a wider expanse of pavers, simply to break the pattern up a bit.

One can see the roughed edges of the original bricks. Obviously placing razor sharp, straight as an arrow  cuts with no softening would clash drastically with the overall look, much the same as how we roughened these pavers up to match their other originals, after cutting:

They are awesome – grinders. And nothing works better for the purpose. Dangerous as heck, too, so wear goggles and gloves, by all means. That is a naked blade running out there.


Roto Tillers January 8, 2010

Filed under: Machines - Other Uses — stevesned @ 6:35 pm

Rototillers are interesting implements. Like just about any other tool, they often reveal themselves to help in many ways which were not necessarily in their original prospectus. I’ve used them to loosen packed gravel, for example, for applying base material to the sub bases of patios and driveways. But generally speaking, rototillers are the “tractors” of the landscaping art. They fulfill the function of not only loosening soil, but of combining amendments together in specific gardens and underneath lawns. Of all the features one can picture a rototilller offering, these two stand out.

Now, not all rototillers are the same. For soils which are already loose – maybe sandy at their base or loam-rich and merely needing some mixing, the front-tined tillers such as the one pictured below might be best.

These guys have a tendency to do some serious bouncing around, however, in more seriously dense and harder-packed soils. Especially if one is opening soil for the first time, hoping to loosen it and thence to amend later, this tiller might do the trick but it is often at the expense of some very serious bouncing around and maneuvering. These are perfect for “medium” soils, with a touch of clay content. They – like almost all tillers, have a depth setting, subject to adjustment with a bar that sticks into the ground behind the business end. They are heavy but they are nice and wide and, in the right circumstances, these original tillers – design-wise – have much to offer.

Now the monster pictured above costs about 8 times more than the other two pictured. This one can cut through just about anything. Self-propelled and extremely weighty, this is pretty much the state of the Gargantuan Roto Tiller art. This one can take down a small mountain. These cut through the toughest soils and do plenty of hard work. Wrestling them can sometimes be a chore – rocks and roots can destroy a guy’s arms as they get caught up in the tines and toss you forward. In fact, it is a literal hazard, owing to the sheer power of these units. Like all bigger machinery, they require alertness and lots of getting used to.

Now we come to the junior sets of roto tillers – items which were not even on the horizon 15 years ago. The “Mantis” – so named, much like the generic “Bobcat”, owing to its initial providers.

Now, these guys are relatively tiny. The one pictured here weighs about 20 pounds and is actually one of the larger versions. These little machines have gone through quite a few adaptations. Their primary downside has always been the integrity of the metals comprising the tines themselves. Easily bendable originally, they would get so out of shape as to render the machine useless unless used in the most delicate of soils. Now, however, they have evolved a bit and have a far more durable tine. These things a truly perfect for working a home garden. I confess to having used them brutally for years myself in preparing beds in tight locations. Easily stored, one man operable and packable, they have much to recommend them. They also do an awful lot of work, let me add. I have a real “thing” for them.


The Landscape Rake January 6, 2010

Filed under: Hand Tools — stevesned @ 5:09 pm

One of my first purchases for “tooling up” a landscaping operation is one of these shown above. Especially in environments which support the use and installations of large grass lawns, rakes like these are the business end of the “Final Grading” operation – the step that leads to actually laying down the sod. I have always typical gone for a 42″ size one – 3 and a half feet wide – because I found it met my own level of strength and ease of operation. Here, for example, is what a field prior to sodding looks like – as benefitted from its final raking with one of these big babies:

The wide swaths it addresses simply make it a far more functional plane for which evening things out and making a perfect surface with filling and cutting able to perform at the same time. The tines also actually do separate out such items as remaining roots and larger objects from the dirt itself, getting caught up when the rake is at a proper angle.

Enterprising landscapers can find any number of other uses as well, from final cleanups and scooting branches and debris into a pile to using the back straight plane for initial leveling for pavers, working on sand and base rock.

This tool is in every single landscaper’s arsenal for good reason.


What is a “Screed”? December 19, 2009

Filed under: Hand Tools — stevesned @ 1:34 am

(click any image to enlarge)

At its simplest, a screed is any mechanism used to produce a completely flat plane. The notched end of the 2 x 4 in the picture above shows us a pre-measured end which “rides” the rails of other wood pieces, permanently embedded along equally pre-measured lines, but, in this case, in two dimensions – height/level and width. By pulling the sand which is poured over the compacted base rock in the picture above, we reach a perfect plane, suitable for laying the brick pavers on top of. Here, they will be fitted into position only needing a final pass with a compactor to compress down into their final resting spots.

Here is an even better look:

Here is a look at a product from PaveTech which I have tried a few times. It works just fine and you can stand up while screeding, a never-to-be-underestimated benefit. I always personally have opted for my own constructed devices, but these are most definitely worth trying. Many people definitely prefer them.


More Water – Irrigation Control Valves December 17, 2009

Filed under: Water Tools — stevesned @ 4:39 pm

Electronic Irrigation Control Valves have worked a remarkable revolution in both the spread of household irrigation and the conservation of water resources. It must seem somehow odd to see someone claim that, by spreading irrigation technology, someone is actually conserving water. I understand the juxtaposition of apparently contrasting  realities. One has to understand the alternatives to understand the approach.

The spread of landscaping itself determines much of this, which is a development made apparent by the wealth being shared by a wider public over the past 50 years. With all these gardens, people who once went out and spread hoses around and then forgot about them, watching the water roll down the curb and into sewers never really concerned themselves with conservation. It has taken a combination of population explosion and water depletion of an alarming quantity to shake us back into the reality that water itself is not always an infinite resource.

What has occurred as a result is quite a change. Terms like “Xeriscaping”, “drip irrigation” and alternate designing methodology are changing the landscape in reaction to these shortages. Literally, lol. More native planting allows plantings accustomed to an area to flourish with little additional waterings. Research into these natives is a now-huge field, replete with implications for designers. As well, alternative garden features, not subject to watering, are also makiing interesting and very unique strides as garden/landscaping features. Patios are becoming far more common, Gazebo’s and garden structures, garden art has taken off – in short, we are finding there is more to gardeing than simply laying a water-thirsty grass lawn and mowing the sucker.

And having said that, we come full-circle, back to how we can somehow manage the distribution of water resources more efficiently. This is where the originator of all irrigation applications comes into play – the Electronic Irrigation Control Valve.

These valves are deceptively simple.  The irrigation solenoid valve is a single chamber divided by a plastic or rubberized diaphragm. A thin spring pushes against the back of the diaphragm, blocking off the water inlet from the water outlet.  The valve is activated by means of a small electric current which is sent into the solenoid spring. The solenoid spring becomes, for all intents and purposes, a tiny magnet. It coils tighter as a result of its own magnetic properties and pulls the piston backward. This seals off the hole allowing air into the chamber. Because the source of air pressure has been removed, nothing is pushing against the outlet side of the diaphragm anymore.  Without this back pressure, the diaphragm is pushed out of the way by the force of incoming water, allowing water to pass freely through the irrigation solenoid valve. When the current causing the solenoid spring to coil ceases, air pressure is allowed back into the valve and seals the diaphragm shut.

The electric current needed to activate this solenoid is pretty tiny. This is a good thing, because it not only uses smaller wire sizes which are easy to deal with, but it  is also very cheap. Connecting to a wall-mounted controller clock allows someone to pre-plan the timing and the duration of the release of irrigating water. Modern innovations which now include weather and moisture sensors take things a high-tech step further. The ability to remotely interact via modem and the Internet allows even more informnation and control.

The development of electronic control valves was a Titanic step in assuring us of proper water usage. In combination with the other forces for change and adaptation, we may very well see beauty and pleasure in our home landscapes to be a constant accompaniment.


The Water Pump December 13, 2009

Filed under: Water Tools — stevesned @ 8:16 pm

It’s fairly stunning what one of these machines can do. The ones pictured above operate in different ways – the blue one  sits in a dry place, all snug and warm and  “pulls’ the water from somewhere, conducting it on through itself to another destination. The other onet sits in water and pumps the water straight out into a pipe for wherever it is destined. The one on the right is called a “submersible pump” and its role in landscaping has just exploded.

In landscaping, the “indoor” pump requires a dry setting- the same as any swimming pool pumps sits. It being electrical and not waterproofed per se, obviously it operates out of a room or constantly dry cavity,  constructed solely for the purpose. The submersibles sit on the bottom of a water pool and function in what results in the same product – running water outward and almost always upward.

Here is a splendid look at two pumps in one water feature, both submersible and both performing separate functions:

(left click any image to enlarge)

What we see in this lower level of a water feature is a blue pump, dedicated to feeding a large pipe, routing the water far to the top and giving the waterfall its overall rate of flow. The smaller pump, as is evidenced by the rock through which a smaller, clear tube is inserted, is what landscapers call a “bubble rock”. These smaller features are for any number of purposes, from enriching the overall look of a water feature such as this one, to providing bubble rocks at anywhere in a landscape to create the sound and motion of water as well as to provide a diverting highlight, featuring the colors and structure of a pretty stone.

In the finished look below, we see the results of the two pumps, doing what they are designed for:

Often, we see smaller submersibles used in other bubble rock features as well.

Nor do “bubble rocks” simply need tiny pumps. Some are downright humongous:

Large waterfalls can be run by those water pumps driven by larger machines – even diesel engines, such as this one at Microsoft Campus in Seattle:

Whatever the effect desired, one can bet there is a pump designed for just that use. Any more, designs are based around the gallons needed, then the proper pump is ascertained. There is literally no limit on what is possible. The effects of this marvelous bit of machine insight has massive effects on landscaping and is very much the cause of the burgeoning installation of waterfalls and small water features now enhancing yards at homes all over the world.


The Plate Compactor December 9, 2009

Filed under: Machines - Other Uses — stevesned @ 8:49 pm

During the course of installing “hardscape” surfaces in landscapes, there are very primary considerations to assess. Regarding such necessarily durable surfaces as driveways and, to only a minutely lesser degree, patios and walkways, considerations of their bases takes precedence over nearly all practical concerns. Absolutely no surface will last without a truly “proper” base. The most important considerations are – as usual – right at the very bottom. The condition and the compactability of the soils under the base gravel and the paving above are hugely important.

(click all images to enlarge)

Most clayish subsurfaces meet a general standard of this compactability. Obviously, rocky and even sandy soils can also meet this level, provided they, too, are actually compacted. Generally, soils with large amounts of organic materials subject to breaking down and disappearing over their well-understood bacteriological life spans will effect a surface above by changing the structure and the shape of the ground below. When this happens, we get “heaving” – from either cold temperatures or from the natural disappearance and change of structure from “mass to gas”, as it were.

Therefore, there needs to be a permanent layer of permeable-yet stable gravel base under whatever surface may be provided. The thickness of this layer is the only variable factor in the mentioning of the above conditions. On patios we often go for about 4 inches of base material over a relatively compact base. That is what we are doing with our other favorite machine – the Skid Steer Loader or “Bobcat” in the scene above.

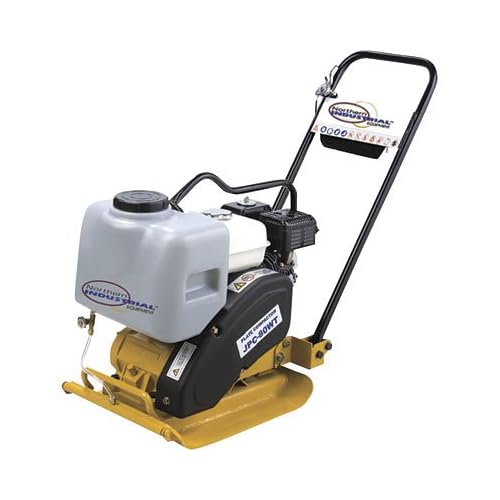
Once this surface is determined, in terms of depth, then the filling, leveling and “compacting” begins. We determine the finished grade, pull a string line and rake and try and approximate the perfect finish. At that point, we “compact” it. We use a Plate Compactor for this purpose.

We can see our hard-working little unit, shown here hiding in the upper right-hand shady spot after working hard. At this stage, with half the sub surface finished tamping, one can spot the difference between uncompacted and compacted gravel easily. These marvelous little machines have a vibrating plate carrying about 200 pounds of compacting energy and literally “walk” – owing to their ingenious shaping at the plate level – with a human guide behind them controlling turns and their direction as well. The finished product is a smooth-topped level of gravel which leaves an entire encrusted base for the work to commence on top of it. Compaction levels of 96-98% are actually possible with these machines, given ideal conditions and about 8-12% water content in the base material. 98% would be more than road worthy, and certainly adequate for driveways.

This is a “just add cement-ready” finish for concrete work and perfectly ready to add the inch of sand and then pavers for paver and pre fab slab patios. These little machines are a “must-have” for landscapers and they have proven themselves time and time again as reliable little machines with actually very few possible glitches.

Below are the finished products of each of those featured. First, the lower pictures:

And from the very top picture:

Interestingly, on brick paver work, the compactor is also used to level and further compact the actual bricks into place, once situated. We toss on a thin sheen of sand over which the compactor travels, sliding across the surface better and sinking the sand into the minute cracks betwen the bricks. As well it serves to pound it all down for a final time, incidentally raising the level of sheer compaction another percentage point.


First Principles December 8, 2009

Filed under: Machines - Earth and Product Moving/Shaping — stevesned @ 3:31 am

This is not a blog geared towards merchandising. It may go that direction in the future, but as of now, it is a blog begun with some pleasure. It will be something written based on experience and in-the-field information and should be something fellow landscapers should appreciate. They are my audience, in the end, along with anyone curious as to how we accomplish the transformations from such messes into something special.
How, for example, do we go from this:

(click images to enlarge)

And this?

To This?

I believe you can see a part of our helpful machine in the background of the second picture. That is but one way and one machine or tool which helps landscapers work their magic. Indeed, in this project the complete list of tools ranges pretty widely.

That is what this blog is about – those tools we use – and for what specific functions in our projects. Nothing else.


Design a site like this with WordPress.com
Get started